Tuesday, December 31, 2019

Sampler: From My Heart Suite

Hello and Welcome!

Welcome to today's post! I hope everyone enjoyed a peaceful and beautiful Christmas holiday! The family and I have been relaxing and spending some quality time before we head back to school and work.  I am grateful for this time over the last few days. 

On the crafting front, I have to say that I am ready to move on from Christmas crafting! I had such fun this year creating mini pizza box decor, candle toppers, gift card holders and of course plenty of Christmas cards...but it's time to move beyond greens, reds and whites!  Time to start working on those birthday cards for the stash, Valentine's Day (it's right around the corner) and just some general, fun and creative projects.  And not to worry...Stampin' Up! has you covered! Starting January 3rd, Stampin' Up! Sale-A-Bration begins!  Be sure to check back FRIDAY for more details!

Today's project features a sneak peek at the all new From my Heart Suite from the Mini Catalog available January 3rd! I am so excited for this suite and all of its possibilities.

And here is today's project...


I wanted to showcase a sampler as my first project with these new products because what better way to show off all that they can do!  This sampler starts with a simple 8" x 8" white shadowbox frame.  The From My Heart Specialty DSP has a chance to really shine in this sampler and is featured as the background in three of the four blocks.  Each block starts with a Flirty Flamingo cardstock base and is then layered with DSP, Whisper White cardstock or vellum.  This DSP coordinates beautifully with Flirty Flamingo and Real Red cardstock and ink pads.  The heart punches and heart doilies are showcased in the larger bottom block.  I love how the doilies coordinate with the punches and it is wonderful to have such versatility with the products.  For extra detail, I've added the 3/8" Real Red Double-Stitched Satin Ribbon to the middle block.  The Faceted Gems add the finishing touches to the stamped heart and sentiment. 

*Crafter's Note: The "Happy Valentine's Day" sentiment is from the "Meant To Be" Cling Stamp Set available in the Annual Catalog (Product #148626)*   


Bundle | 153931 | $88.25
From My Heart Specialty Designer Series Paper
Heartfelt Bundle
Real Red 3/8" Double-Stitched Satin Ribbon
From My Heart Faceted Gems
Heart Doilies
Heart Foil Tins

Today's project was inspired by the following challenges:


Keep Austin Crafty!
------------------------------------------------------------------------------------------------------------------------

Did you like today's post?!  If so, don't forget to...

Wednesday, December 25, 2019

Merry Christmas!

Image result for merry christmas farmhouse

Merry Christmas from ATXPaperHouse! 

May your Christmas season be filled with joy and light! 

Sincerely, 

Angela
(Owner and Designer - ATXPaperHouse) 

Tuesday, December 24, 2019

Project: Mini Pizza Box

Hello and Welcome!

Merry Christmas Eve! Well, Christmas is upon us! Can you believe it?!?! I hope everyone's milk and cookies are out and ready for Santa.  Our house is buzzing with Christmas excitement and we are ready for ol' Saint Nick!

Christmas Eve means its time to share the last Christmas project of the year.  Going along with my theme from last week, today's project features not just a card, but a fun and unique way to wrap those little gifts.  You can check out last week's post HERE which featured a simple and fun candle topper.  Today's project features the Stampin' Up! mini pizza box.

And here is today's project...


Today's project features the Stampin' Up! Alpine Adventure die-cuts.  The layout was inspired by a vintage card I found on Pinterest and created by fellow cardmaker and blogger "A Blog Called Wanda".  I attended two different ornament exchanges last week and what better way to wrap cute, little ornaments then by showcasing some Stampin' Up! products and styles!  The base of this project is the mini pizza box.  I have to admit that I ordered these boxes thinking that I would use them to hold my 3" x 3" note card creations.  But I am almost through the set and I think I have only used them for those cards once!  Here they get to hold the cutest, little Texas ornament that I found at this year's A Christmas Affair event held by the Junior League of Austin.  You can check out the ornament in pictures below! 


How about that Texas ornament!? Isn't it just the cutest! Courtesy of Brush Strokes Pottery (@BrushStrokesPottery) right here in the ATX! I love the creativity that Austin has to offer and I hope and strive to add to that creativity each day! Keep Austin Crafty ya'll!

Project Details
Size: 3.5" x 3.5" mini pizza box
Paper: Early Espresso, Crumb Cake, Real Red, Whisper White
Ink: Garden Green, Real Red, Versamark, White Embossing Powder
Stamp Set: Alpine Adventures, Half Full
Tools: Alpine Adventures die-cuts
Accessories: Good Morning Magnolia linen twine

 Keep Austin Crafty!
------------------------------------------------------------------------------------------------------------------------

Did you like today's post?!  If so, don't forget to...

Tuesday, December 17, 2019

Project: Candle Decor

Hello and Welcome!

Welcome to today's post! Christmas is getting closer and closer! Are you ready?! I certainly am NOT, but I think I feel this way each and every year! I am certainly ready for Christmas break though! This next long vacation cannot come soon enough.  Four days and counting...

This year I was excited because there seemed to be lots of opportunities to showcase some of my papercrafts and share my love of crafting with lots of different people.  From candle exchanges to ornament exchanges, it has been fun thinking of new ways to wrap fun little gifts.

And here is today's project...


My daughter's school hosts a "Moms Christmas Party" each year and I was excited to attend my first event with this mom group.  It included a candle exchange and overall was a wonderful evening. 

This is a very simple and quick project to create.  It starts with a candle as the base and I was just looking to decorate the top of the candle for just a little something extra.  The color combinations are very classic Christmas: Real Red, Mossy Meadow and Whisper White.  Pair those colors with a simple "Merry Christmas" sentiment and holly die-cuts to produce a quick and easy candle topper.  The Layered Circles die-cuts happened to be just the right size and added a great base in the Christmas colors.  Need another project idea?!...This could easily be transformed into a gift tag!


Project Details
Paper: Real Red, Mossy Meadow, Whisper White
Ink: Real Red
Stamp Set: Half Full
Tools: Alpine Adventure die-cuts, Banner Triple Punch, Layering Circles die-cuts
Accessories: Metallic sequins, Linen Twine

Keep Austin Crafty!
------------------------------------------------------------------------------------------------------------------------

Did you like today's post?!  If so, don't forget to...

Tuesday, December 10, 2019

Card: Beautiful Promenade with a Mix of Magnolia

Hello and Welcome!

Welcome to today's post! I hope everyone is having a wonderful week! I have lots more Christmas cards that I would like to make and here's hoping that that actually happens! But before we talk about more Christmas cards, today's card is instead a wonderful example of mixing different sets to pull together a lovely card.

And here is today's project...


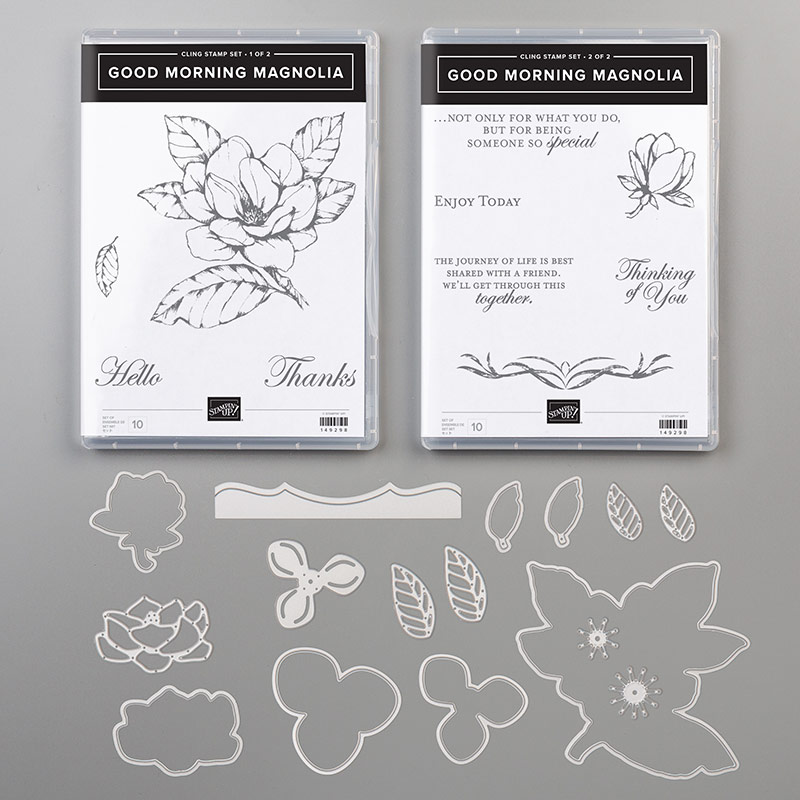
This card is a mix of the Good Morning Magnolia and Beautiful Layers sets.  They are two of my favorites and I love the way these two have come together.  The base colors for this card are Crumb Cake and Mossy Meadow which of course complement the Good Morning Magnolia DSP.  The layers of die-cuts from the Beautiful Layers set really bring together the softness of this card.  I did not initially set out to create such an intricate card, but sometimes those can be the most fun to create because with each layer the card just starts coming together. 


As an added bonus, I created a separate tag to complement the card.  The tag was super easy to create and started with a base of Crumb Cake and Whisper White.  The large magnolia stamp was masked to create a blank space just the perfect size for the "Thinking of You" sentiment.  The magnolia was then colored with Stampin' Blends in Crumb Cake, Mossy Meadow and So Saffron. 


Card Details
Size: 5 1/2" x 4 1/4"
Paper: Crumb Cake, Whisper White, Mossy Meadow, Good Morning Magnolia DSP
Stamp Set: Beautiful Promenade, Good Morning Magnolia
Ink: Mossy Meadow, Crumb Cake, Stampin' Blends for coloring
Tools: Beautiful Layers die-cuts, Layering Circles die-cuts, Delightful Tag Topper punch
Accessories: Good Morning Magnolia twine/ribbon, pearl embellishments

Check out the other options that are available with the Good Morning Magnolia and Beautiful Promenade sets below!

Product #151087

Product #146842

For ordering details, check out the "Shop With Me" icon on the right hand panel!


Keep Austin Crafty!
------------------------------------------------------------------------------------------------------------------------

Did you like today's post?!  If so, don't forget to...

Tuesday, December 3, 2019

Stampin' Up! Year-End Close Out!

Stampin' Up! Year-End Closeout Starts Today! 


If you love great deals, now is your time! The Stampin' Up! Year-End Closeout is the best time to shop! You'll get great discounts on retiring Stampin' Up! products, including stamp sets and items from the holiday catalog.  The Year-End Closeout happens only once a year, so make sure you shop soon! Shop early for the best selection! And don't forget: This offer is only while supplies last! 

Promotion Details
  • Sales Period: December 3, 2019 - January 2, 2020
  • No minimum purchase required
  • Retiring items from the 2019 holiday catalog are available while supplies last
  • Items and discounts may vary by market (depending on inventory levels)

Keep Austin Crafty!
------------------------------------------------------------------------------------------------------------------------

Did you like today's post?!  If so, don't forget to...

Tuesday, November 26, 2019

Happy Thanksgiving!

Happy Thanksgiving 
from ATXPaperHouse! 

Image result for thanksgiving 2019 images


Wishing you and your family and friends a wonderful and Happy Thanksgiving! 


Check back next Tuesday for more of my paper crafting adventures!


Keep Austin Crafty!
------------------------------------------------------------------------------------------------------------------------

Did you like today's post?!  If so, don't forget to...
  • Leave a comment below! I love to hear your thoughts on the day's project!
  • Check at the ATXPaperHouse Card of the Month Club!
  • Follow me on Pinterest.
  • Check out my Etsy Shop.   New Listings Just Added!  

Tuesday, November 19, 2019

Card: Fall Birthday

Hello and Welcome!

Welcome to today's post! I hope everyone's week is off to a great start! I don't know about anyone else, but we are certainly counting down the days until Thanksgiving break!  A nice long break is in order for this family and we are hoping for some good weather to go along with it.  

Fall is in the air as we get ready for Thanksgiving and I realized that I had not put together any festive Fall cards yet.  So I got right to work with this fall inspired birthday card.  

And here is today's project...


For this card, I played with the Seasonal Layers die-cuts and boy did I have fun! The die-cuts in this set are so versatile and I love that intricate, larger leaf popping out from behind.  The Soft Suede card base mixed with Crumb Cake and those deep, fall colors really adds to the richness of this card.  

The sentiment is cropped from a piece of Crumb Cake using the "birthday" die-cut from the Well Written die-cut set and the "happy" is heat embossed with white embossing powder.  I am definitely becoming much more comfortable with my heat embossing tool and think I've got it mostly down.  I love the way it adds just a little something special to the cards.  


Card Details
Size: 4 1/4" x 5 1/2"
Paper: Soft Suede, Neutrals 6 " x 6", Whisper White, Crumb Cake, fall colors of your choice
Ink: White Embossing Powder and heat tool
Stamp Set: Sunshine Sayings
Tools: Seasonal Layers die-cuts, Rectangle Stitched die-cuts, Well Written die-cuts
Accessories: Metallic embellishments


Keep Austin Crafty!
------------------------------------------------------------------------------------------------------------------------

Did you like today's post?!  If so, don't forget to...
  • Leave a comment below! I love to hear your thoughts on the day's project!
  • Check at the ATXPaperHouse Card of the Month Club!
  • Follow me on Pinterest.
  • Check out my Etsy Shop.   New Listings Just Added!  
Tuesday, November 12, 2019

Card: Season's Greetings

Hello and Welcome!

Welcome to today's post! I hope everyone's week is off to a great start! We have had a blast of arctic air here in Austin, so it is beginning to feel a lot like winter around here.  I do think it's supposed to be warm again this weekend though, so we are just all kinds of confused here in Texas.  Not sure if we should be pulling out coats and boots or shorts and flip flops.  Oh well...that's Texas weather for ya!!

Today's project combines a few different stamp sets and die-cuts.  I love when I am able to feature multiple sets in one card because I think it helps to show the versatility of all of these sets.  I did also realize that I must be a HUGE fan of this gingham paper because as I took an inventory of my Christmas cards most of them are using this paper just in a different color!  So if you need some ideas for gingham paper, you have come to the right place! 

And here is today's project...


This card is just simple and I definitely get a farmhouse vibe with the simple wreath and little red bow.  I have been noticing the notched sides on several card examples and I am so glad that I gave it a try with this card because I love how it came out.  Not only does it protect the side of the paper from tearing, but I think it just adds a nice little touch.         


Card Details
Size: 4 1/4" x 5 1/2"
Paper: Early Espresso, Neutrals 6" x 6", Whisper White, Mossy Meadow
Ink: Early Espresso, Cherry Cobbler, Mossy Meadow
Stamp Set: Well Wishes, Alpine Adventures
Tools: Alpine Adventures die-cuts, Rectangle Stitched die-cuts
Accessories: Linen Twine 

Keep Austin Crafty!
------------------------------------------------------------------------------------------------------------------------

Did you like today's post?!  If so, don't forget to...
  • Leave a comment below! I love to hear your thoughts on the day's project!
  • Check at the ATXPaperHouse Card of the Month Club!
  • Follow me on Pinterest.
  • Check out my Etsy Shop.   New Listings Just Added!  

Wednesday, November 6, 2019

Card: Christmas is right around the corner...

Hello and Welcome!

Welcome to today's post! I am so excited to share today's card because I have been busy, busy with my Christmas cards for this year.  For a crafter who intends to make all her cards handmade for family, friends and co-workers, Christmas is right around the corner.  Don't worry, I haven't put my Christmas decorations up yet (I have a rule that we should celebrate Thanksgiving first), but it is all green, red and sparkles in my craft room!

And here is today's project...


I wanted to go #simplestamping on this card and I think I made that work.  The Well Wishes stamp set just lends itself to that task as the stamps are simple and elegant.  I love that beautiful wreath with a simple, Cherry Cobbler bow.  Stamparatus to the rescue on this on because it is so helpful to be able to get that bow positioned just right! It is just a lovely way to say Merry Christmas.

This is also a great layout and would be an easy card to "step-up" if you are an avid crafter and want to add a little more creativity.  Perhaps add some additional embellishments or maybe try your hand at heat embossing your sentiment?? Hmmm...all very good ideas! Perhaps you will see those in next week's post ;) For today, I simply changed the details a bit, but kept to the spirit of the original card.  Do you have a favorite? Can you spot the differences?


Card Details
Size: 4 1/4" x 5 1/2"
Paper: Very Vanilla, Mossy Meadow
Ink: Mossy Meadow, Cherry Cobbler
Stamp Set: Well Wishes, Half Full
Accessories: Pearl embellishment

Today's project was inspired by the following challenge:

Inspo List: use up scraps (Mossy Meadow pieces), circles (wreath), green (wreath and scraps)


Keep Austin Crafty!
------------------------------------------------------------------------------------------------------------------------

Did you like today's post?!  If so, don't forget to...

Tuesday, October 29, 2019

Project: Wine Tag Project

Hello and Welcome!

Welcome to today's post! I hope everyone's week is off to a great start! This week is shaping up to be on the quieter side, which I am extremely thankful for.  Just a little trick-or-treating planned for Halloween and then hopefully the family is able to take it easy this week.  Here's hoping the weather holds out for Wednesday though...I think my little will be extremely bummed if yet another Halloween is dampened by the rain! Say your rain prayers people!

I thought I would play along with the fun over at the TGIF Challenge blog today.  They are featuring a "tag project" and I thought I would make up some quick wine tags to get ready for holiday season entertaining.  And what luck...the "Half Full" stamp set has two beautiful Christmas stamps.  Love when I can go through my stash and find some hidden treasures!

And here is today's project...


Both tags feature a Very Vanilla base and are paired with Merry Merlot and Mossy Meadow.  The metallic embellishments are a great little addition to bring out some Christmas sparkle.  I have always loved the sprig punch, so I was glad to have these little sprigs pre-punched and ready to use for these tags.  Probably will make a few more of these tags before the holidays are through.  I just love how they can be used to decorate your own table or be given as a part of a gift to dress up a plain old bottle of wine. 


Project Details
Size: 5 3/8" x 3 1/8"
Paper: Very Vanilla, Merry Merlot, Mossy Meadow, 6" x 6" Neutrals, Crumb Cake
Ink:Mossy Meadow, Crumb Cake
Stamps: Half Full
Tools: Sprig Punch, Rectangle Stitched die-cuts
Accessories: Metallic embellishments, Linen twine

Today's project was inspired by the following challenges:


Keep Austin Crafty!
------------------------------------------------------------------------------------------------------------------------

Did you like today's post?!  If so, don't forget to...

Tuesday, October 22, 2019

Card: A Christmas Classic

Hello and Welcome!

Welcome to today's post! It has been a busy couple of weeks here for the family in Austin, TX and as we approach the holidays I know it will only be getting busier.  Keeping everything straight and being the master of the family calendar has been requiring another 8 hours in a day.  Anyone know how to increase the number of hours in a day...no??  Ok moving on...

I thought I should start working on my Christmas cards this week, so I pulled out a few of my Christmas things and got to work! I was brand new to Stampin' Up! around this time last year and the first set I bought was the Alpine Adventure stamp set and coordinating die-cuts.  I know there are so many beautiful sets that come out each year; however, I don't think I got my full use out of this set last year, so I've decided to keep using it for this year's cards! I also have so much unused DSP that I am on a mission to try and use it up before the end of the year!  Challenge accepted!

And here is today's card...


Hey Angela, you didn't actually use any Christmas DSP?? You're right, you don't always need Christmas paper to make a Christmas card.  I'm loving that my cards may be a little less traditional in my effort to use up the paper that I have in my stash.  Once again, the gingham paper (part of the Neutrals 6" x 6" set) is great and paired with the Mossy Meadow cardstock really puts me in the Christmas mood.


Love that sled and wreath! I'm glad that I have chosen to use this set again because there are just so many options.  P.S. Inside stamp is simply a Michael's Christmas stamp purchase...needed a lot of good inside sayings so picked this up at a good discount ;) who doesn't love a good sale?!

Card Details
Size: 5 1/2" x 4 1/4"
Paper: Crumb Cake, Mossy Meadow, Merry Merlot Neutrals 6" x 6", Very Vanilla, Whisper White
Stamps:Alpine Adventure
Ink:Mossy Meadow
Tools: Alpine Adventure die-cuts, Layering Circles die-cuts
Accessories: Good Morning Magnolia ribbon


Today's card was inspired by the following challenge:


Keep Austin Crafty!
------------------------------------------------------------------------------------------------------------------------

Did you like today's post?!  If so, don't forget to...

Tuesday, October 15, 2019

Card: Sending a little love...

Hello and Welcome!

Welcome to today's post! I hope everyone's week is off to a good start! I am so excited to announce an upcoming workshop at my local library.  It will be held on February 5, 2020 and will be a Valentine's Day themed workshop! I know it seems like a long time away, but it's never to early to start planning! And it has been nice to take just a teeny, tiny break from Thanksgiving and Christmas card planning!

I ordered the Meant To Be stamp set with coordinating Stitched Be Mine die-cuts as the focus of my Valentine's cards.  Once they were delivered, I couldn't wait to start crafting with them and I wasted no time.  I looked to Pinterest for a little inspiration and decided to CASE the lovely Mary Fish on this first card.  I utilized her card layout; however, decided to change up the color scheme for what I had on hand and showcase the gingham gray cardstock.  I love that design and I find myself using that designed paper in more and more cards!

And here is today's project...


As it gets closer to Valentine's Day, I will start to create my "traditional" cards focusing on the reds, pinks and whites.  But for this first card, I just wanted something subtle and a little less traditional.  It really just gave me a chance to play with the die-cuts and stamps and get a feel for how they would look on a finished project.  The pinks and grays were so cute that I couldn't pass up using them together.  I also love to create my own stamped backgrounds, so I added another layer of stamping on the Whisper White cardstock.


Card Details
Size:   1/4" x 5 1/2"
Paper: Basic Gray, Neutrals 6" x 6", Whisper White, Vellum
Ink: Powder Pink and Gray Granite
Stamp Set: Meant to Be
Tools: Stitched Be Mine die-cuts, Rectangle Stitched die-cuts
Accessories: Linen Thread

Tip: I did not have the coordinating Powder Pink cardstock for the flower die-cut.  But instead of using plain white, I gently pushed a scrap of Whisper White to the Powder Pink ink pad and allowed to dry for several minutes.  I then ran that inked scrap through the Big Shot with the die-cut and "ta-da" a beautiful Powder Pink die-cut accent.

Be sure to check out my workshops page for upcoming details on this workshop!


Keep Austin Crafty!
------------------------------------------------------------------------------------------------------------------------

Did you like today's post?!  If so, don't forget to...

Tuesday, October 1, 2019

Case it Up Tuesday!

Hello and Welcome!

Welcome to today's post!  So I have to confess that I have been running behind on my blog posts...obviously! But thankfully it is not because I haven't had time to craft, but because I have been finishing up a custom order of handmade cards that I am finally ready to deliver! New job, new school, busier days...plus a custom order of cards...just call me super mom! Not that I'm bragging...haha! Ok just a little a bit ;) There's always time to craft!

Anyways, I thought I would showcase some of the cards from my order.  Most of them are duplicates of prior cards, but there are a few that have some new elements.  Hence the "Case it Up" title because not every card has to be brand new.  Take the colors from your favorite card and change the layout.  Or take the layout and change the sentiment.  Viola! A brand new card, but your planning has been cut in half! 

And here are today's projects...


I think this might have been my favorite card of the bunch.  You can see the inspiration for this card here.  The stamp set used on the original card is one of my all time favorites and I think it can be used for so many occasions.  But it is currently stored in my mom's craft stash, so in an effort to speed up my order I changed it up and went for the Good Morning Magnolia set.  I love the look of the magnolia stamped background.

Card Details
Size: 4 1/4" x 5 1/2"
Paper: Crumb Cake, Whisper White, Vellum, Mossy Meadow
Stamp Set: Good Morning Magnolia, Delightful Day
Ink: Mossy Meadow
Tools: Rectangle Stitched die set, Layering Circles die set
Accessories: Mossy Meadow twine, galvanized button, Stampin' Blends (Mossy Meadow, So Saffron and Crumb Cake)


The finished products and some more of my favorites! 


You can check out most of the project details here on my blog or head on over to Pinterest to pin your favorites!

Keep Austin Crafty!
------------------------------------------------------------------------------------------------------------------------

Did you like today's post?!  If so, don't forget to...

Tuesday, September 17, 2019

Card: Magnolia Inspiration

Hello and Welcome!

Welcome to today's post! I hope everyone's week is off to a great start! It is starting to show some hints of fall here in Austin, TX and by hints I mean the temperature has only been 97 degrees rather than 103 degrees!!!  We are scheduled to get some much needed rain, but you never know with Texas weather.  My plants sure could use a good soaking that's for sure! 

Because my outdoor gardens are in dire need of rain water and not producing any beautiful flowers for me to look at I decided to add some flower beauty to today's card! Every time I use this suite it just gets more beautiful!    

And here is today's project...


Aren't those magnolias gorgeous?! The sentiment section is popped and wrapped with Magnolia Lane ribbon for that extra touch.  I have been working with my Stampin' Blends more and more and love how the colored magnolias turned out both on the front and on the inside of the card (see below).  I added the stamped leaves on the envelope of course (don't forget the envelope!).  

This card went to a lovely new coworker for her birthday! Hope she likes it!


Card Details
Size: 4 1/4" x 5 1/2"
Paper: Mossy Meadow cardstock, Magnolia Lane DSP, Vellum, Whisper White
Ink: Mossy Meadow, Early Espresso
Stamps: Good Morning Magnolia, Sunshine Sayings
Tools: Rectangle Stitched die cut, Magnolia Memory die cut
Accessories: Magnolia Lane ribbon combo pack, Stampin' Blends

Today's card was inspired by the following challenges: 

Simon Says: Monochrome

--------------------------------------------------------------------------------------------------------------------------
Are you ready for the holidays?! The Holiday Catalog is live...


Keep Austin Crafty!
------------------------------------------------------------------------------------------------------------------------

Did you like today's post?!  If so, don't forget to...