Tuesday, June 25, 2019

Card: Daisy Lane

Hello and Welcome! 

Welcome to today's post! I am excited to share a project today featuring the all new Daisy Lane Bundle.  The new bundle consists of the Daisy Lane stamp set and coordinating Medium Daisy Punch.  It is a wonderful new set and I think a great compliment to the previous Daisy Delight set.  Don't forget that these sets can be used together to create some beautiful and lovely cards!

And here is today's card...


Aren't those flowers just lovely?! I found the medium daisy punch easy to use and the punched flowers were the perfect size for a standard A2 size card.  I needed to make a birthday card for a dear friend, so I combined the Daisy Lane set with the Sunshine Sayings set for the perfect sentiment.  The background stamp is also from the Daisy Lane set and if you know me then you know I love stamping my own background paper.  The fern stamp is perfect for creating that background visual.  

Tip:  So next on my wish list is a "label" punch (maybe the Everyday Label or Timeless Label...do you have a favorite?), but until then I've been doing some improvising.  So here is my tip...stamp the sentiment on a 2 1/2" x 1" piece of Whisper White cardstock.  Using the smallest Layered Circles die-cut, position the die-cut on the corner of the cardstock approximately 1/4" in and run through your die-cut machine creating a rounded out edge.  Repeat the prior step for each of the corners and Viola! a homemade labeled sentiment!


Card Details:
Size: 4 1/4" x 5 1/2"
Paper: Early Espresso, Mossy Meadow, Vellum, Whisper White
Ink: Early Espresso, Mossy Meadow, Powder Pink
Stamp Set: Daisy Lane, Sunshine Sayings
Tools: Rectangle Stitched die-cut, Medium Daisy Punch, Magnolia Memory die-cut, Layered Circle die-cut
Accessories: Linen Thread, bling of choice ;)

Today's card was inspired by the following challenge:


Keep Austin Crafty!
------------------------------------------------------------------------------------------------------------------------

Did you like today's post?!  If so, don't forget to...

Thursday, June 20, 2019

Card: CASE it Up Thursday

Hello and Welcome! 

Welcome to today's post!  Ever think..."hey, I can make that!" or "I wonder how they did that?"...when looking through crafting catalogs! Well, those are exactly the thoughts that led to today's project.  The Stampin' Up! catalog is an endless array of inspiration and today I wanted to focus on techniques rather than try and create something new.  

So I took the project sample on page 122 of the 2018-2019 Stampin' Up! catalog and practiced with my Stamparatus to create this lovely card featuring both current and retired products.  

And here is today's project...


The Stamparatus was a lifesaver on this project and it is one of my favorite tools.  I am still learning all the ways that this tool can be used for sure.  But for now just being able to re-stamp in this liner pattern was reason enough for me to purchase this tool.  I stamped each color separately.  Each line was created by simply moving the clear plates one notch and re-inking.  

Stamparatus
Stamparatus (Product #146276)
If you are familiar with the original card from the catalog or have the old catalog on hand, you'll notice that it originally featured the "Thank You" die-cut from the original bundle.  The die-cut is still available, but I thought I'd change my card up to feature the Well Written die-cut and some additional embellishments.  


Card Details
Size: 4 1/4" x 5 1/2"
Paper: Soft Suede, Whisper White, Crumb Cake, Share What You Love DSP
Ink: Crumb Cake, Fresh Fig, Powder Pink  
Stamp Set: A Big Thank You
Tools: Well Written die-cut, Layered Circles die-cut
Accessories: Share What You Love Adhesive Pearls, Linen Thread

Keep Austin Crafty!
------------------------------------------------------------------------------------------------------------------------

Did you like today's post?!  If so, don't forget to...


Tuesday, June 18, 2019

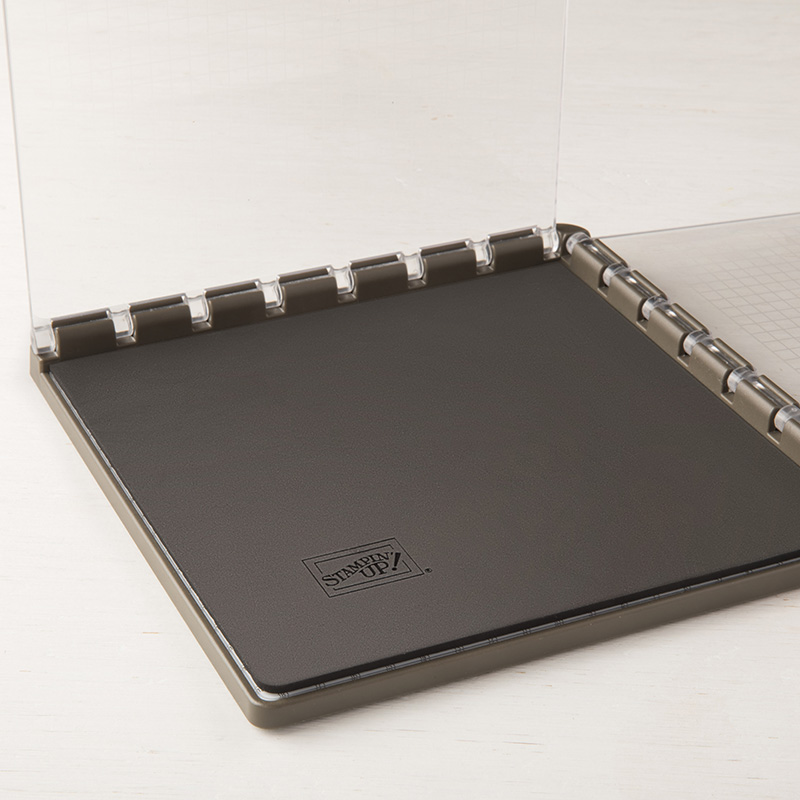
What's New with Stampin' Up!: Stampin' Storage


Storage by Stampin' Up! is designed to store and showcase your Stampin' Pads, Stampin' Ink Refills, Stampin' Blends, Stampin' Write Markers, Watercolor Pencils, and other accessories: Here are some other features and benefits of Storage by Stampin' Up!: 
  • Keeps Products organized, tidy, visible and trackable at all times
  • Designed to be stylish, durable, compact, stackable and modular
  • Stacks vertically and can be arranged to fit practically any flat workspace
  • Blends in naturally with most home decor with its white neutral color


Need help with possible configurations? Click HERE for a handy configuration chart.  

Feel free to contact me with purchasing or general questions via email (atxpaperhouse@gmail.com) or leave a comment below! Ready to shop!? Click HERE and enter my name and state (Angela Slutz/Texas) in the "Find My Demonstrator" tab.  Happy Shopping!

Keep Austin Crafty!

-----------------------------------------------------------------------------------------------------

Did you like today's post?!  If so, don't forget to...
  • Leave a comment below! I love to hear your thoughts on the day's project! 
  • Follow me on Pinterest.
  • Check out my Etsy Shop.

Thursday, June 13, 2019

Card: First Magnolia Flower

Hello and Welcome!

Welcome to today's post.  I was so excited to share today's card because it was a very special one for me to make! My sweet mom had her birthday this week and I of course made her a beautiful card featuring none other than the Magnolia Lane suite.  I was super excited to try out the magnolia flower 3-D cut-outs and feature one of the flowers on the card.  I have been playing with the flowers for awhile and I think I finally got them figured out! 

And here is today's card...


Doesn't the flower just steal the show!?!? I sent the layer of Early Espresso through the Wood Plank Embossing folder and covered it with a layer of vellum.  I always think vellum softens up a card and I love the look it gives over a layer of designer paper.  

I used a mix of the Sunshine Sayings and Well Written sets for the sentiment.  And of course the Magnolia Memory Die Cuts. 


Card Details
Size: 4 1/4" x 5 1/2"
Paper: Mossy Meadow, Early Espresso, Whisper White, Vellum, Magnolia Lane Designer Series Paper
Ink: Mossy Meadow
Stamp Set: Sunshine Sayings
Tools: Magnolia Memory Dies, Well Written Dies,Wood Plank Embossing Folder
Accessories: Magnolia Ribbon Combo, Share What You Love Pearls

Side note on the photo since it is not my usual white background...I of course forgot to take a picture of the card before it was mailed off! But lucky for me...Mom lives close by so I took a picture at her house ;) Just one of the many reasons I'm so thankful that my whole family calls Austin home! 

Today's card was inspired by the following challenge: 


Keep Austin Crafty!
------------------------------------------------------------------------------------------------------------------------

Did you like today's post?!  If so, don't forget to...

Tuesday, June 11, 2019

Suite: Magnolia Lane Suite

Hello and Welcome!

I wanted to once again focus on the beautiful Magnolia Lane Suite for today's post.  I just can't get enough of this line of stamping goodies.  The possibilities are endless with this suite and they can be used for so many occasions.  

Also, I am excited to announce my new workshops are on the calendar for August and September!  These classes are designed for all levels of crafters, so no prior card-making or stamping experience is required.  If you are local to the Austin, TX area, you can check out my workshops page for further details.  

To go along with today's class announcement, I wanted to share a few examples of class projects.  You'll notice that they take a "Step-It-Up" approach in that the cards go from simply stamps, ink and paper to the addition of multiple layers, die-cuts, etc.  Again, this is a great way to learn about card-making and stamping or simply get ideas on how to add more detail to your current cards.  

And here are today's projects...

Card #1: Simple stamping


In card #1, the stamp set is really able to shine as it is the main focus on the top layer of Whisper White cardstock.  The magnolia is stamped in Mossy Meadow and the sentiment is stamped in Powder Pink.  

Card #2: Add a die-cut


As the title states, in card #2 I added a simple die-cut magnolia from the Magnolia Memory die set.  The two layers are cut in Early Espresso and Crumb Cake.  In addition, the Rectangle Stitched Die set is used for the background and sentiment cardstock.  

Card #3: Bring on the layers and embellishments


Ok, so this card has "everything but the kitchen sink" as the saying goes! It uses layered Designer Series Paper with vellum, multiple die-cuts, embellishments and even some extra coloring on the magnolia flowers.    

Card Details
Size: All cards measure 4 1/4" x 5 1/2"
Paper: Magnolia Lane Designer Series Paper and coordinating cardstock, vellum
Ink: Mossy Meadow, Early Espresso, Powder Pink
Stamp Set: Good Morning Magnolia
Tools: Rectangle Stitched Die, Magnolia Memory Die, Layering Circle Die
Accessories: Magnolia Lane Ribbon Combo, Metallic Sequins

So there you have it! One Stampin' Up! suite three different ways! I have so much fun creating these types of cards for classes.  My first instinct is always to add and use as many goodies as possible, but don't forget that sometimes the simplest cards can be the prettiest.  


Keep Austin Crafty!
------------------------------------------------------------------------------------------------------------------------

Did you like today's post?!  If so, don't forget to...

Thursday, June 6, 2019

Card: Daisy Delight!

Hello and Welcome!

I hope everyone is having a wonderful week! I know for all of my fellow stampers it has been a wonderful week since the 2019-2020 Stampin' Up! Annual Catalog was released on Tuesday! I have had so much fun looking through it and getting my wish list together and I hope you have one too!

Today I wanted to share a card that utilizes one of the carryover sets from previous years and one that I hope may be around for quite some time.  It is the Daisy Delight stamp set and coordinating Daisy Punch.  This set is so versatile and I can't wait to create additional cards with this wonderful set! 

And here is today's card...


The daisy is so simple and elegant and with the punch you can get that perfect 3D look.  I stamped and punched two daisies and then layered them together to get that full flower look.  The banner is made with the Rectangle Stitched Die set.  Fun little trick...you can crop your rectangle and then using the same die cut measure from corner to corner and then crop out the triangle at the bottom. Viola! One rectangle stitched banner! 

Card Details
Card Size: 4 1/4" x 5 1/2"
Paper: Night of Navy, Whisper White, Light Blue (non-SU on this card; however, Stampin' Up!'s Balmy Blue would be a nice coordinating color here I think)
Ink: Dapper Denim, Crumb Cake
Stamp Set: Daisy Delight, Good Morning Magnolia
Tools: Rectangle Stitched Die Cut, Daisy Punch, Wood Plank Embossing Folder
Accessories: Magnolia Lane Ribbon Combo


Today's card was inspired by the following challenges...


#FF0035, #festivefridaychallenge, Father's Day, Blue


Keep Austin Crafty!
------------------------------------------------------------------------------------------------------------------------

Did you like today's post?!  If so, don't forget to...

Tuesday, June 4, 2019

What's New with Stampin' Up!: Annual Catalog Launch!

Hello and Welcome!

Ok folks it is finally here! Introducing the new 2019-2020 Stampin' Up! Annual Catalog!


Check out these lovely projects using this year's catalog goodies...


The possibilities are endless, so let your creativity shine using this year's new Stampin' Up! products.  

Ready to Shop?! Simply click under the right side bar "SHOP NOW" and have fun! 


Keep Austin Crafty!
------------------------------------------------------------------------------------------------------------------------

Did you like today's post?!  If so, don't forget to...